Lists In Photoshop Done the Right Way
lists the correct way in Photoshop
Published by Vincent Pickering
on
I have lost count the number of times I have seen over a designers shoulder and noticed them struggling with formatting lists in Photoshop.
Let’s run through the ways not to do it:
How not to create a list in Photoshop.
- Draw the bullets individually and painstakingly align each one. This is obviously bad, because as soon as the text has to be moved it takes forever to re-align the bullets.
- Copy the bullets from Word. This does work to a point, but lacks the flexibility in formatting and you are pasting odd invisible characters in to your PS file, which can lead to bad things. Plus you must have Word installed, and I wouldn’t wish that on anybody.
- Creating the list in HTML and copy & pasting it in to the file. This is just dodging the problem so someone else has to deal with it. Not cool.
Correctly Create A List In Photoshop
The objective here is to do this all in the text, that way the mock-up can always be easily reorganised with minimum fuss.
Learn how to output a bullet point correctly in the font:
On a Mac: Alt + 8
On a PC: Hold down the ALT key and type 0149
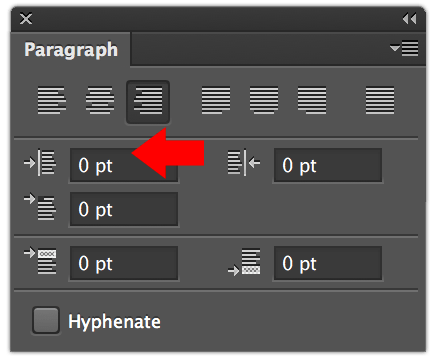
Go to: Window -> Paragraph
and the top left box dictates your left margin.
Using this you can simply do:
- a minus value to exdent your margins (as I do on this blog)
- any positive value to indent your lists.
That’s great, but I want custom bullet points. Got you covered. To do this, you need to use an icon font and simply style the bullet with whatever you like.